Connect Facebook: Step-by-Step Guide

Connecting your Facebook Page to Sofia Creative allows you to automate your social media publishing workflow. You can schedule posts, upload high-quality images, and publish Reels directly from our editor. This guide provides a detailed, step-by-step walkthrough to set up your own Facebook App for maximum control and security.
Professional Account Required
The Facebook API requires a Facebook Page. Personal profiles cannot be used for automated publishing. We recommend linking your Page to a Meta Business Portfolio.
Step 1: Create a Meta Developer App
To interact with Facebook's API, you must first create an "App" in the Meta ecosystem. This app acts as the bridge between Sofia Creative and your Facebook data.
- Go to the Meta for Developers Dashboard and log in.
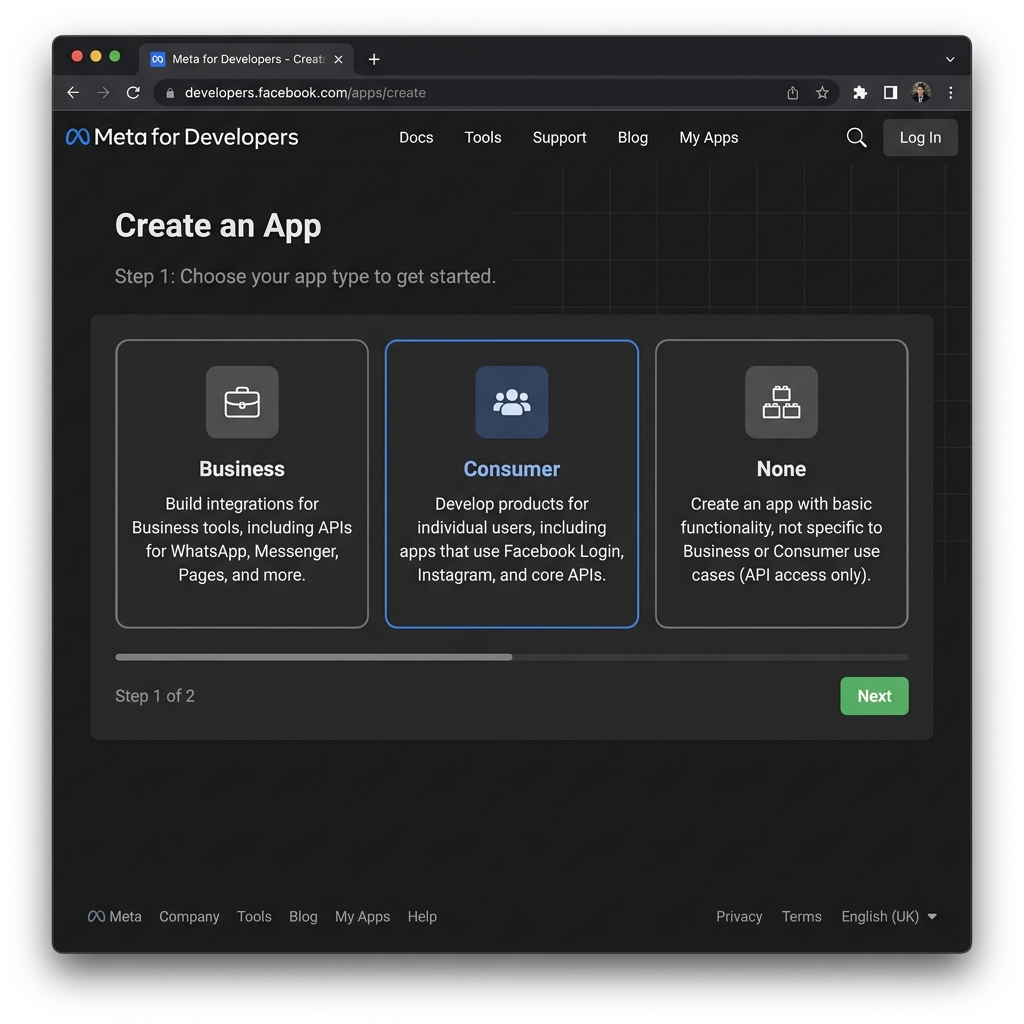
- Click the Create App button.
- Select Other as your use case, then choose Business. This type provides the most robust access to Page management features.
- Fill in your App Name (e.g., "Sofia Publishing") and contact email.
Step 2: Retrieve API Credentials
Every Facebook App has two unique identifiers: an App ID (public) and an App Secret (private). Sofia Creative needs these to identify your app to Facebook.
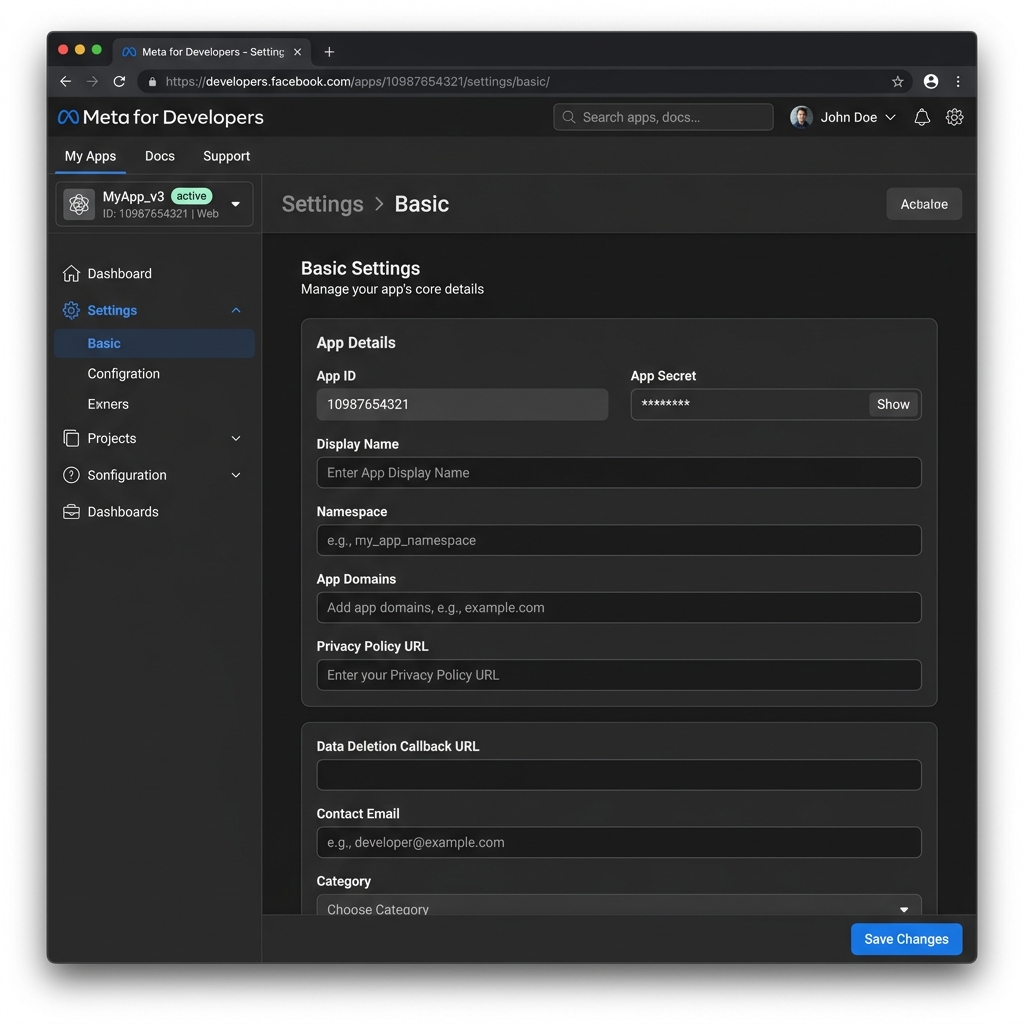
- In the left sidebar, navigate to App Settings → Basic.
- Locate the App ID at the top of the page.
- Click Show next to the App Secret. You may be asked to re-enter your password.
- Important: Provide a Privacy Policy URL in the basic settings. Facebook requires this to move your app out of Development Mode later.
Step 3: Configure Facebook Login & Redirect URI
The "Facebook Login" product handles the secure handshake (OAuth) between our platform and your account. You must whitelist our redirect URL for security.
- Click Add Product in the sidebar and select Facebook Login.
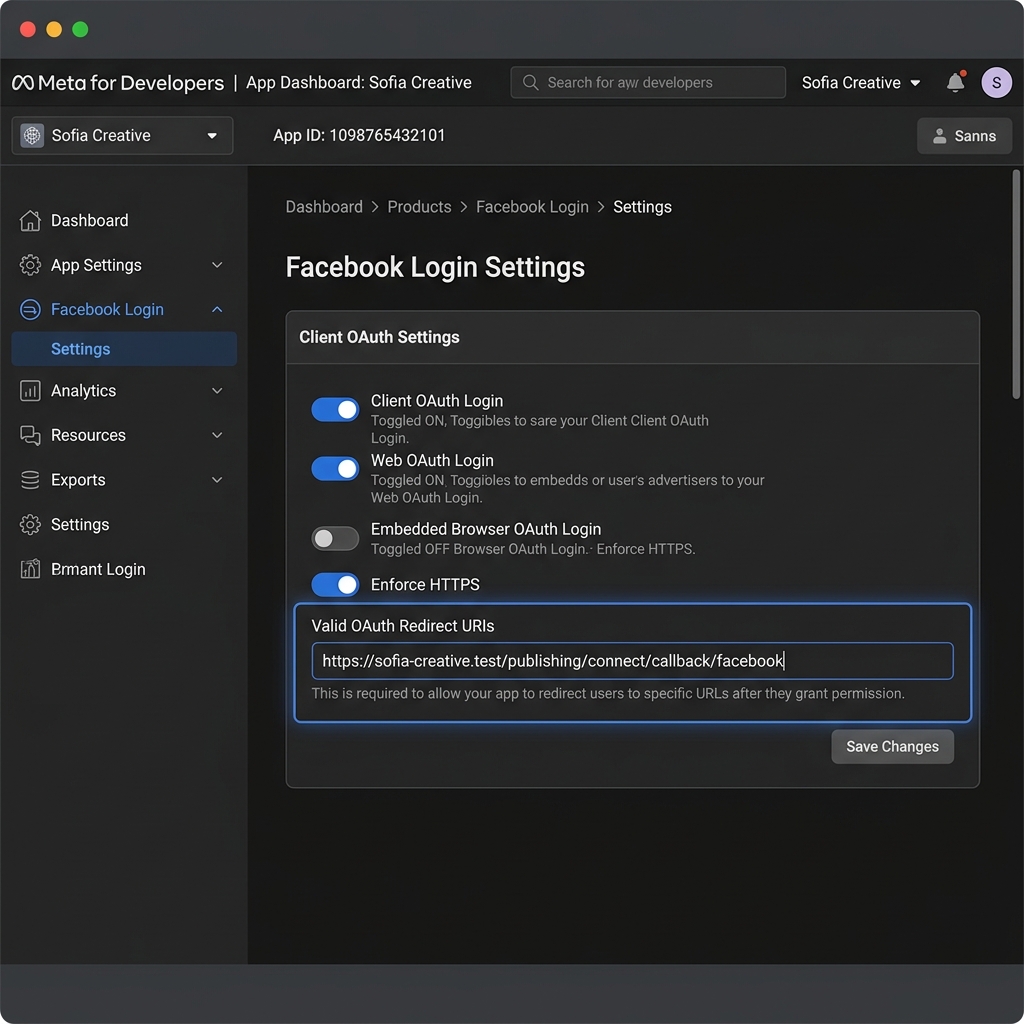
- Go to Facebook Login → Settings.
- Find the Valid OAuth Redirect URIs field and enter your unique callback URL:
https://your-domain.com/publishing/connect/callback/facebook
- Ensure Client OAuth Login and Web OAuth Login are toggled to Yes.
Step 4: Connect in Sofia Creative
Now, head back to your Sofia Creative workspace to finalize the connection.
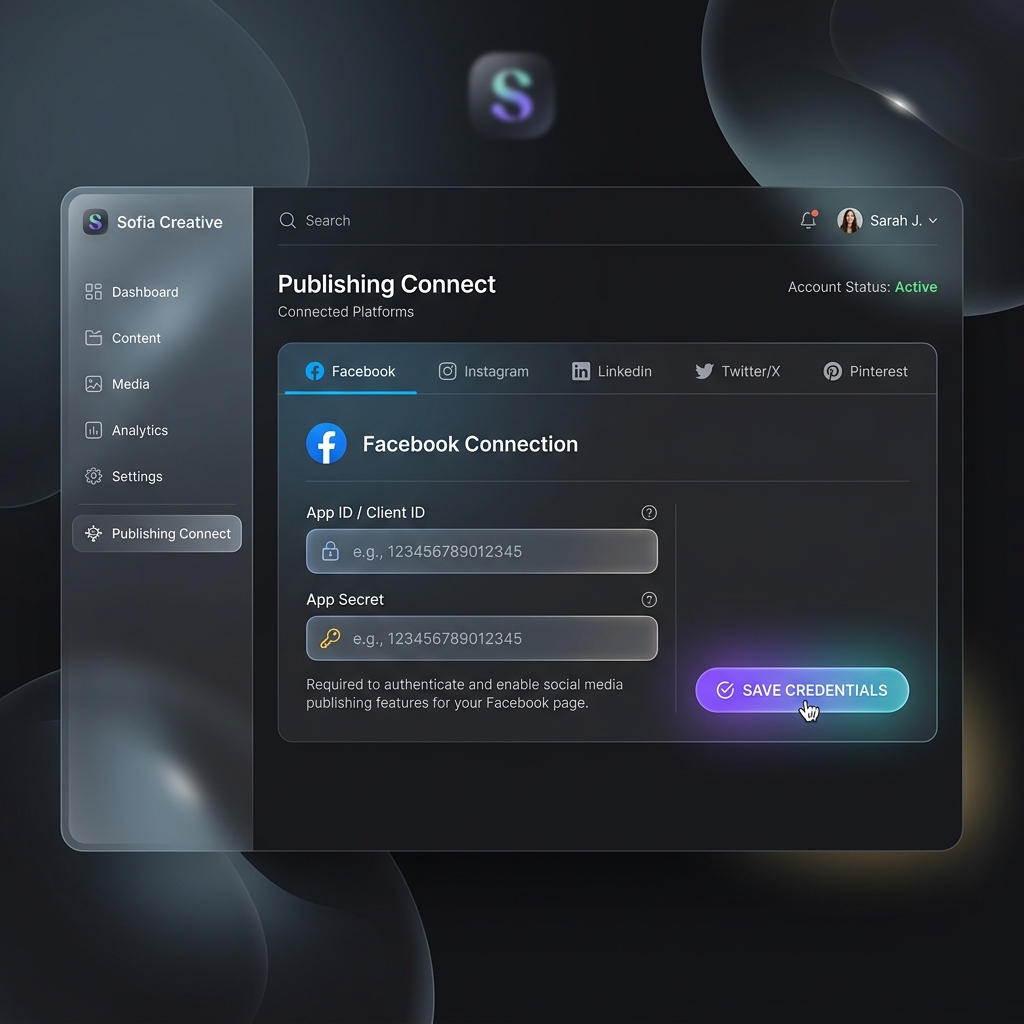
- Navigate to Publishing → Connect Accounts from the main menu.
- Select the Facebook tab.
- Paste the App ID and App Secret into the respective fields.
- Click Save credentials.
- Finally, click the Connect button. A Facebook popup will appear—follow the prompts to select your Page(s) and grant all requested permissions.
Troubleshooting & Best Practices
Permission Mismatch
If you can't see your Page, ensure you are an Admin of that Page and that you checked all boxes during the Facebook authorization popup.
Live vs Dev Mode
Your app remains in Development Mode until you submit it for review. Only Admins/Testers can post while in Development Mode.
- Token Refresh: Access tokens typically last 60 days. Sofia Creative attempts to refresh them automatically, but if disconnection occurs, just click "Reconnect".
- Two-Factor Auth: Meta may require 2FA to use certain API features. Ensure your developer account is fully verified.